While the AWS console gives you a nice point and click interface, and really helps you explore the vast service catalog of AWS, the use of the CLI should not be neglected.
Some of the advantages of the CLI:
- Reusable, can the same command multiple times, perhaps with slight modification for quickly creating multiple instances of similar resources.
- Reproducible, can run the same command, to reproduce exactly the same kind of resource as has been created before.
- Programmable, can create scripts that gather info from configuration files and then run commands to combine the other two advantages.
I do not list ‘Convenience’ here, as that is much more of a taste and preference.
Why MFA?
Enabling MFA increases the security of your AWS account by quite a lot. Without it, anyone who can get control of your email account can take over your account.
For more information on why and how to enable MFA, please look at the AWS documentation
MFA using the Console
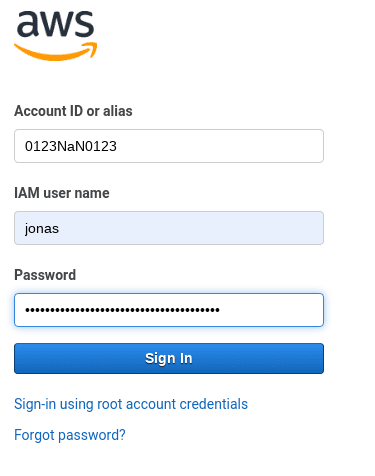
When you log into the console with a browser, you are faced with a dialog asking you for ‘Account ID or alias’, ‘IAM user name’ and password.
After that you will get an ‘Multi-factor Authentication’ dialog
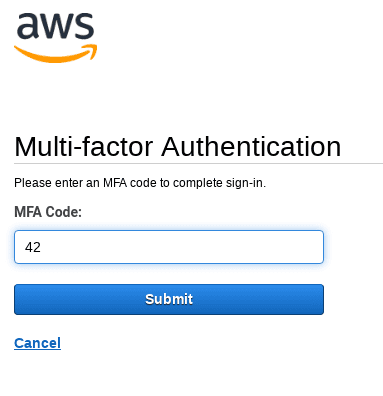
After you have entered valid MFA code, you get access to the Console and can use it as usual.
But enough introduction.
MFA using the CLI
This is the part that I wanted to write about, using multiple accounts with even more roles. For this example we will imagine a person, Bob Johnson, who has an IAM account in 2 accounts, and can assume 3 roles in the third account.
This gets hairy quickly, but let us not skimp on the details. So to realize the imagination, first let us define user accounts. The following credentials are meant to belong to the same physical user.
Account ACME
- IAM user: bob
- AWS AccountID: 12345NAN1234
- Access key: NOTETHISISNOTREALKEY
- Access secret: ANDTHISISNOTEITHERavalidKEY+Butpleasetry
- IAM Roles: AcmeAdminRole
Account FooBar
- IAM user: bjohnson
- AWS AccountID: 78902NAN7890
- Access key: THISISNOTAREALKEYYES
- Access secret: SPOILERALERTThisKeyISNOTVALIDJustExample
Account BasZoo
- AWS AccountID: 34322NAN4567
- IAM Roles allowed to be assumed from account 78902NAN7890
- DeveloperRole
- ArchitectRole
- AdminRole
This was the scenario, now let us look at how to implement this.
Implementation
First we need to look at how to configure the CLI.
If you have a working CLI configuration and want to try this, just copy your working folder away to a safe place and start with a clean configuration.
Basic user
We begin here. We define the 2 accounts in ~/.aws/config
[AcmeAccount]
mfa_serial = arn:aws:iam::12345NAN1234:mfa/bob
output = json

[FoobarAccount]
mfa_serial = arn:aws:iam::78902NAN7890:mfa/bjohnson
output = json
And corresponding credentials in ~/.aws/credentials
[AcmeAccount]
aws_access_key_id = NOTETHISISNOTREALKEY
aws_secret_access_key = ANDTHISISNOTEITHERavalidKEY+Butpleasetry

[FoobarAccount]
aws_access_key_id = THISISNOTAREALKEYYES
aws_secret_access_key = SPOILERALERTThisKeyISNOTVALIDJustExample
The IAM identity
To map the IAM identity to the accounts, we add the following to ~/.aws/config
[profile acme]
user_arn = arn:aws:iam::12345NAN1234:user/bob
source_profile = AcmeAccount

[profile foobar]
user_arn = arn:aws:iam::78902NAN7890:user/bjohnson
source_profile = FoobarAccount
This gives us profiles that are connected to the account defined before. And
this is the only place that we want to refer to AcmeAccount and FoobarAccount.
Then we can use the aws sts get-session-token command to get temporary
credentials with the profile. I wrote a simple python wrapper around that
command. I call the script refresh_mfa.py Check the end
for the script.
We want to match 1 to 1 on identities and accounts in this part.
Temporary credentials
To get new temporary credentials, we use the script with the IAM profile name as an argument.
$ refresh_mfa.py acme
Creating acme credentials profile
OTP from device: 324235
$ refresh_mfa.py foobar
Creating foobar credentials profile
OTP from device: 424242
This will create an entry in ~/.aws/credentials that will look something
like this:
[acme]
aws_access_key_id = ASITISTHISISNOTVALID
aws_secret_access_key = nosuprisehereeitherisit?Ihopenot+Random!
aws_session_token = Yeah+ThisIs+some+serious+lenghty/string+so/I+cannotBebothered+mTFcLwZSciG+Uv35QUwBH6lGCMxAD1bES2OaC+Lt1ARrm4Xk0JVI76QKFbl9Ww1s+i0gU+orRnQ78JP6rVZvDPlBFLm8DveWOaJV+SKwAYN65xdjSo5yA+IUl2iAwcbaQImLJLCPxxOWULfLg25HSWUT7MpjLX7Q4yGcYhpnivX8hMoSGGIRu6MnJS/irpWOGbyo+hLm8DveWOaJV+SKwA52dn

[foobar]
aws_access_key_id = ASIBASIFASITROLOLOLO
aws_secret_access_key = yetanotheraccesskey+3eFvZbrBAYmF2NqGfuYb
aws_session_token = SVGD76eBPRU32Zp/mTFcLwZSciG+Uv35QUwBH6lGCMxAD1bES2OaC+Lt1ARrm4Xk0JVI76QKFbl9QoGZXIvYXdzEDkaDBPaqBhgOdfHf2Vv6M0AlPp4/LprUNJABJxhWWOPe8aUy5ZKtTMbxR+6O6lmQn8lD7+6hAhKP178JasTJipBN1hTKCBgC+HEkWBKthk8vroZx7pCt+cGLoeU2KCFGxtyw5Cp/IghAe9uV4MUa7kfNew4hc+D+8yiQis42g2go/R72LQT2eWbd/o56A8JE
These entries are temporary, all 3 values will be changed when you run
refresh_mfa.py next time.
And now we can use the profile acme to run aws commands
$ aws --profile acme --region eu-west-3 cloudformation list-stacks
{
    "StackSummaries": []
}
Roles and profiles
This rather cumbersome setup becomes really useful when we add different
profiles and roles to the mix. To complete the setup we imagined earlier in
the document, we can now add the following to the ~/.aws/config file
[profile baszooDev]
region = eu-central-1
role_arn = arn:aws:iam::34322NAN4567:role/DeveloperRole
source_profile = foobar

[profile baszooDevUs]
region = us-east-1
role_arn = arn:aws:iam::34322NAN4567:role/DeveloperRole
source_profile = foobar

[profile baszooArch]
region = eu-central-1
role_arn = arn:aws:iam::34322NAN4567:role/ArchitectRole
source_profile = foobar

[profile baszooAdmin]
region = eu-west-1
role_arn = arn:aws:iam::34322NAN4567:role/AdminRole
source_profile = foobar

[profile acmeAdmin]
region = us-west-1
role_arn = arn:aws:iam::12345NAN1234:role/AcmeAdminRole
source_profile = acme
With this in place we can now run aws commands with different roles, just by
varying the named profile.
$ aws --profile baszooDev ec2 describe-instances --query Reservations[].Instances[].InstanceId
[
    "i-024253342be542beb",
    "i-0b42ec24299542858",
    "i-0242cac4271042d9c",
    "i-084273d422b04233b",
    "i-0142bb34263142bb1",
    "i-014249342a9e428b0",
    "i-0942ee24201742d30",
    "i-0d42b824211b42716"
]
The only difference between the baszooDev and the baszooDevUs profile is
the region. So if Bob uses the baszooDevUs profile, he asks for instances in
us-east-1
$ aws --profile baszooDevUs ec2 describe-instances --query Reservations[].Instances[].InstanceId
[]
And you only need the MFA authentication for the foobar or acme
profile. And while the temporary credentials are valid for e.g. foobar, one
can use a profile that sources foobar like baszooArch and baszooDev.
Complete configuration files and script
Here are the complete configuration files for the accounts, as described previously
~/.aws/config
[AcmeAccount]
mfa_serial = arn:aws:iam::12345NAN1234:mfa/bob
output = json

[FoobarAccount]
mfa_serial = arn:aws:iam::78902NAN7890:mfa/bjohnson
output = json

[profile acme]
user_arn = arn:aws:iam::12345NAN1234:user/bob
source_profile = AcmeAccount

[profile foobar]
user_arn = arn:aws:iam::78902NAN7890:user/bjohnson
source_profile = FoobarAccount

[profile baszooDev]
region = eu-central-1
role_arn = arn:aws:iam::34322NAN4567:role/DeveloperRole
source_profile = foobar

[profile baszooArch]
region = eu-central-1
role_arn = arn:aws:iam::34322NAN4567:role/ArchitectRole
source_profile = foobar

[profile baszooAdmin]
region = eu-west-1
role_arn = arn:aws:iam::34322NAN4567:role/AdminRole
source_profile = foobar

[profile acmeAdmin]
region = us-west-1
role_arn = arn:aws:iam::12345NAN1234:role/AcmeAdminRole
source_profile = acme
~/.aws/credentials
[AcmeAccount]
aws_access_key_id = NOTETHISISNOTREALKEY
aws_secret_access_key = ANDTHISISNOTEITHERavalidKEY+Butpleasetry

[FoobarAccount]
aws_access_key_id = THISISNOTAREALKEYYES
aws_secret_access_key = SPOILERALERTThisKeyISNOTVALIDJustExample
refresh_mfa.py
#!/usr/bin/python3
import sys
import configparser
import json
import os
from os.path import expanduser

if(len(sys.argv) <= 1 ):
    exit("Need named profile")


home = expanduser("~")
requestedProfile = sys.argv[1]
awsConfig = configparser.ConfigParser()
awsCred   = configparser.ConfigParser()

awsConfig.read("%s/.aws/config" % home)
awsCred.read('%s/.aws/credentials' % home)

try:
    mfaARN = awsConfig[awsConfig["profile " + requestedProfile]['source_profile']]['mfa_serial']
except KeyError:
    try:
        mfaARN = awsConfig['default']['mfa_serial']
    except KeyError:
        exit("Need MFA serial in config file")

profiles = set( awsCred.sections())
configprofiles = set( awsConfig.sections())

if( requestedProfile in profiles and "profile " + requestedProfile in configprofiles):
    print("Updating %s profile" % requestedProfile)
else:
    if( "profile " + requestedProfile in configprofiles):
        print("Creating %s credentials profile" % requestedProfile)
        awsCred.add_section(requestedProfile)
    else:
        exit("No such profile \"%s\" in config" % requestedProfile )

try:
    OneTimeNumber = int(input("OTP from device: "))
except ValueError:
    exit("OTP must be a number")


response = os.popen("aws --profile %s sts get-session-token --serial-number  %s --token-code %s" % ( awsConfig["profile " + requestedProfile]['source_profile'],
                                                                                                 mfaARN,
                                                                                                 str(OneTimeNumber).zfill(6))).read()

try:
    myjson = json.loads(response)
except json.decoder.JSONDecodeError:
    exit("AWS was not happy with that one")

awsCred[requestedProfile]['aws_access_key_id']     = myjson['Credentials']['AccessKeyId']
awsCred[requestedProfile]['aws_secret_access_key'] = myjson['Credentials']['SecretAccessKey']
awsCred[requestedProfile]['aws_session_token']     = myjson['Credentials']['SessionToken']

with open('%s/.aws/credentials' % home, 'w') as awsCredfile:
    awsCred.write(awsCredfile)
Update
- 2025-09-03: Format