What you’ll need to follow along
To gain some understanding about OpenID Connect and Keycloak no tools are needed. If you however want to experiment and follow along yourself on how to get started with OpenID connect and Keycloak you’ll need some basic tools.
Make sure to have the following installed:
- JDK 8+
- Maven
- IDE/Text editor
- Docker or Podman
Source code can be found here github.com/GustafNilstadius/OIDC-Keycloak-Vert-X-example.
Background
The predecessor of OpenID Connect is OAuth2.0 (“Open Authorization” version 2). As the name suggest, OAuth2 is used for authorization. Most of us have probably encountered OAuth2 at some point in time, often recognized by the “Log in with” e.g GitHub, Google or Facebook account (although many of these now use OpenID Connect). The foundational functionality in OAuth2 is to retrieve an access token can be used to access data on the resource server (see image bellow). OAuth2is not meant to be used for authentication.
OAuth2 specifies that the access token should be treated as opaque, meaning the token can’t be interpreted by the client (our application server). Since the access token and is opaque, no information about the resource owner is available to the client application server.
OAuth2 should not be used for authentication or for AuthZ, role base access control. The access token is only supposed to be used to identify and authenticate against the resource server and not on the communication between the resource owner and the client application server.
OpenID Connect
OpenID Connect (OIDC) solves many of the above problems of OAuth2, primarily the lack of information about the resource owner (user) and authentication. This enables OpenID Connect to be used for Single Sign On (SSO). In contrast to OAuth with the opaque tokens, OpenID Connect heavily relies on JWT. This in turn makes the tokens readable by the client application server and allows for payload/metadata to be included.
JWT and the payload of the JWT enables the ability for AuthZ and role based access control on the client application server, and to verify the signature and validity of the JWT without a round trip to the authorization server (Keycloak in our case).
OpenID Connect is based on OAuth and is backwards compatible with a client application server that doesn’t yet support OAuth. The data models look the same between OAuth2 and OpenID Connect for the most part except that an ID token is returned in conjunction with the access token (in step 4 of bellow image). The ID token contains even more data about the person and enables for OpenID Connect to include information such as links to profile images, home address or any other information linked to the resource owner/user in question.
Most OpenID Connect authorization servers has the functionality to publish the configurations for the OpenID Connect service. For faster development and deployment, this is the case with Keycloak, and it simplifies setup immensely.
How OpenID Connect it works
- Resource owner triggers/initiates the authorization request, this could be by trying to access a restricted resource without a valid session/token or by clicking on a “Login” button.
- Resource owner completes the authentication/authorization on the OpenID Connect enabled service and is redirected back to our application with an authorization grant code.
- The authorization grant code is exchanged by our server.
- Our client application server receives the access token + ID token.

Keycloak
Keycloak describes itself as “Open Source Identity and Access Management”. That pretty much sums it up. Keycloak makes setting up identity brokers and user federations a breeze. Mainly for this guide, Keycloak is OpenID Connect compatible (OpenID Connect certified).
Setup
Now we have a basic understanding of OpenID Connect and Keycloak. Let’s get is set up and test it out.
Keycloak in docker
The first step we need to do is get Keycloak running locally. It’s a breeze to get it running with OCI containers. In this example I choose Docker, but feel free to use any OCI compliant container host.
docker run -p 8989:8080 -dt -e KEYCLOAK_ADMIN=admin -e KEYCLOAK_ADMIN_PASSWORD=admin quay.io/keycloak/keycloak:19.0.2 start-dev
Let’s take a quick look at the command.
-p 8989:8080: We bind the host port 8989 to 8080 in the container, the default port of Keycloak.-e KEYCLOAK_ADMIN=admin: We set the environment variableKEYCLOAK_ADMINtoadmin. This will be out admin username for Keycloak.-e KEYCLOAK_ADMIN_PASSWORD=admin: Setting the environment variableKEYCLOAK_ADMIN_PASSWORDtoadmin. This will be the default password for our admin user. This should be changed.quay.io/keycloak/keycloak:19.0.2: The image we are going to run. Version 19.0.2 is the latest as of the time of writing this.
Note: we have not specified a database. Keycloak will use an embedded in memory database with no persistence, meaning all data will be lost if you shut down the container.
Configure Keycloak
You should now have Keycloak running on localhost:8989. Head on over and login to the admin console with the credentials provided when starting the container.
1. Create a realm
Keycloak uses what they call ‘realm’ to separate environments. Everything we do in Keycloak has to exist in a realm.
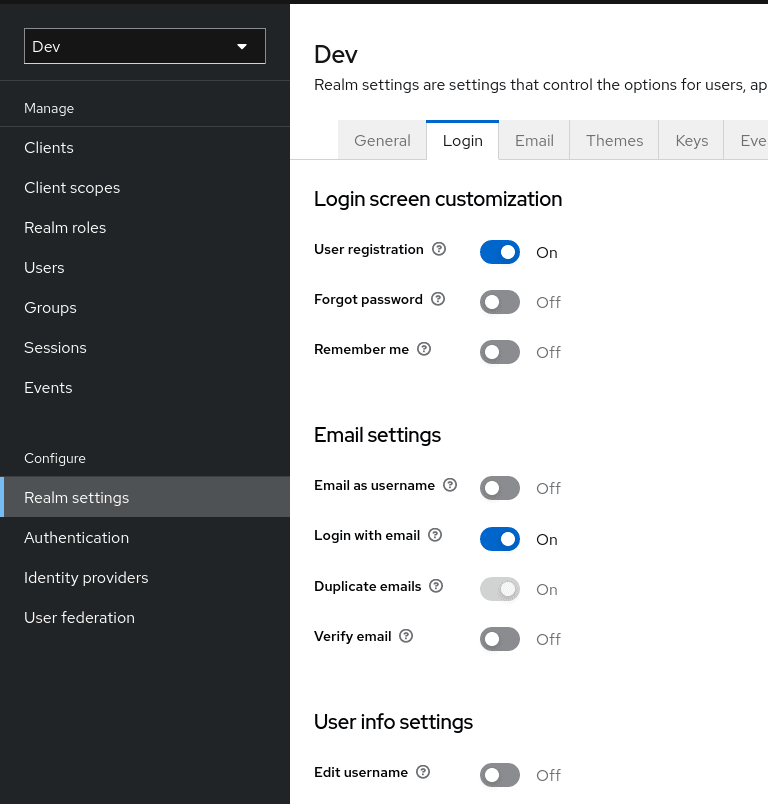
Let’s go ahead and create a realm called dev. Navigate to Realm Settings in the menu and go to the Login tab to enable user registration.


Enable user registration in Keycloak.
2. Create and configure a client
Client in this context is not to be confused with our client application server. A client in Keycloak represents an interface for one or more client applications to communicate with. A client can have different scopes and be able to see different data depending on the configuration and the need of the client applications. Some client applications might require extensive data on the resource owner (user) and some might not.
We will in this demo leave most things default and configure the bare minimum to get up and running with Keycloak and OpenID Connect.
- Make sure you are in the
devrealm. - Select client in the left menu and click
Create client. - Creating the client
- Client type
OpenID Connect. - Client ID
dev-client. - (Next page)
- Client authentication to
on. - Create.
- Client type
- Navigate to your recently created client (should be redirected to it after the creation) and enter the
Credentialstab. Note the client secret, you’ll need it to use the client. - In the same client, navigate to the
Settingstab and scroll downAccess settings.- Set Root URL to
http://localhost:8888 - Set Valid redirect URI to
/* - Set Home URL to
http://localhost:8888/index.html - Save
- Set Root URL to
Now your Keycloak is all set up and ready for use!
You can also explore the Keycloak OpenID Connect discovery endpoint on localhost:8989/realms/dev/.well-known/openid-configuration. This will be consumed by our application later to configure the OpenID Connect connector.
Client application server
The last piece of the puzzle is our client application that will use OpenID Connect to authenticate users. Source code can be found here github.com/GustafNilstadius/OIDC-Keycloak-Vert-X-example.
Our application is written in the event driven Java framework Vert.X. Vert.X is an alternative to Spring Boot and offers very high concurrency and a non-blocking API.
Configure the application
Navigate to the conf/conf.json file.
Enter the client secret from the previous step and save. An example is given below, note that your OIDC_CLIENT_SECRET will differ.
OIDC_DISCOVERY_URL points to the base path for the OpenID Connect discovery path, this does not need changing.
{
  "OIDC_CLIENT": "dev-client",
  "OIDC_CLIENT_SECRET": "LwwKkgK63RAGYW53rTmhT8Givj1mzpmn",
  "OIDC_DISCOVERY_URL": "http://localhost:8989/realms/dev"
}
Compile and package application
To package your application:
mvn clean package
Run the application
To run your application:
java -jar target/redpill.linpro.bbl.oidc.demo-1.0.0-SNAPSHOT.jar --conf conf/conf.json
An exception might present itself to warn that Keycloak supports some cryptographic protocols that Java doesn’t. This can be ignored.
The server should now be running on port 8888, head over to http://localhost:8888/ to explore the application. It’s a very very simple website.
Evaluating the code
Navigate to the file src/main/java/com/gustafn/redpill/linpro/bbl/oidc/demo/MainVerticle.java.
Session handler
For OpenID Connect to function properly in our case. In Vert.X we create a non-clustered session store and link it to a session handler. We then register the session handler on the router to handle HTTP requests.
Router router = Router.router(vertx);
LocalSessionStore localSessionStore = LocalSessionStore.create(vertx);
SessionHandler sessionHandler = SessionHandler.create(localSessionStore);
/*....*/
router.route().handler(sessionHandler);
Configure OpenID Connect - Keycloak
OpenID Connect is an extension to OAuth2, so we use a OAuth2 connector to create the connection and OIDC handler. You explore the OpenID Connect service discover endpoint, the Keycloak OpenID Connect discovery endpoint is available here: localhost:8989/realms/dev/.well-known/openid-configuration.
// Options for the OpenID Connect Vert.X client.
OAuth2Options clientOptions = new OAuth2Options()
  .setClientId(config().getString("OIDC_CLIENT"))
  .setClientSecret(config().getString("OIDC_CLIENT_SECRET"))
  .setSite(config().getString("OIDC_DISCOVERY_URL", "http://localhost:8989/realms/dev"));

// Initialize the Keycloak connection and use the OpenID Connect service discovery to create the OIDC handler.
KeycloakAuth.discover(
  vertx,
  clientOptions)
  .onSuccess(oAuth2Auth -> {
    ...
    // Protect all routes starting with '/private' with out OIDC handler.
    router.route("/private/*").handler(oauth2handler);
    ...
   })
  .onFailure(startPromise::fail);
OpenID Connect with Keycloak and Vert.X in practice
With everything up and running, head over to http://localhost:8888/ and we’ll start exploring how it all works in practice.
To follow along, open the developer tools in your browser (usually F12 button will open it) and go to the Network tab.
Pressing the Click here for secret stuff. link will try to direct the user to http://localhost:8888/private/index.html.
Since the path is under the /private path authentication is required for access, and since we are not logged in we will be redirected to Keycloak to authenticate, this triggers/initiates the authorization request.
The response from our application server is a 302 with a redirect location.
The redirect location URL contains some query parameters that tells Keycloak what we want to do and to initiate a OpenID Connect authentication and where to redirect the user after successful authentication.
This should be seen in your developer tools in your browser (together with other requests).
HTTP/1.1 302 Found
location: http://localhost:8989/realms/dev/protocol/openid-connect/auth?state=jpGd7FWg&redirect_uri=http%3A%2F%2Flocalhost%3A8888%2Fcallback&scope=openid&response_type=code&client_id=dev-client
If you enabled User registration in the configuration of Keycloak (see above) you should be able to create a user. Follow the instructions to create a user and as you click Register you will be redirected back to our application.
This is visible as two logs in our browser developer tools.
First a response form Keycloak with a 302 redirect. In the Location header we can see the redirect URL that links back to our callback endpoint.
HTTP/1.1 302 Found
...
Location: http://localhost:8888/callback?state=jpGd7FWg&session_state=fca13ce5-30f0-47da-8bb7-770d8ebd0473&code=b79a5345-3379-470c-9781-19fb3e7cd568.fca13ce5-30f0-47da-8bb7-770d8ebd0473.8bb01f13-9bcb-4abe-a3ba-02374af1f76d
This should trigger a call to the URL given in the Location header. With the code given as a query parameter in the Location header, our application server can retrieve a OpenID Connect Access token and ID token from the Keycloak server.
You are now authenticated and can access the protected page.
By navigating to localhost:8888/private/account (or clicking User data) you can inspect the ID token, and the default data included in the token.
Conclusion
OpenID Connect with the help of Keycloak is a quick way to get started protecting your service (whether written in Vert.X or not). Keycloak makes the job a breeze and OpenID Connect is flexible extension of OAuth2.
Updates
- 2025-11-25 Formattings
